开源实例之WireGuard
前言
本篇介绍 WireGuard 及其用于内网穿透的实例。了解什么是内网穿透可以参考《开源实例之frp》一文中的介绍。
WireGuard 介绍
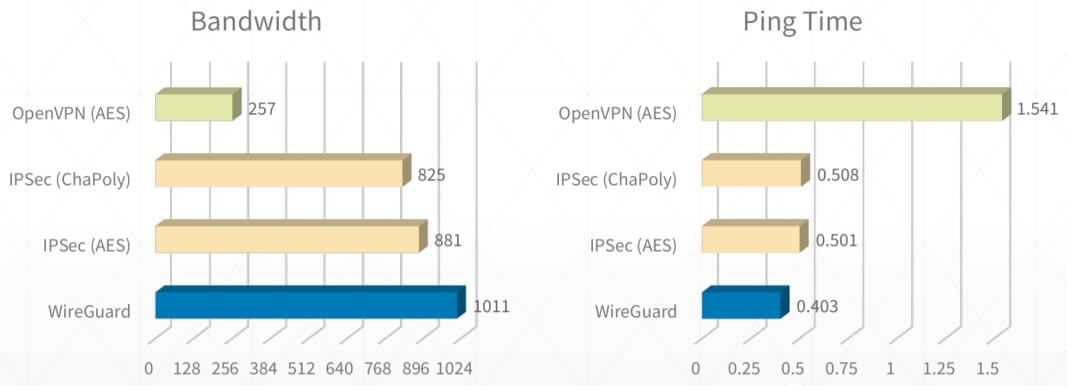
WireGuard is an extremely simple yet fast and modern VPN that utilizes state-of-the-art cryptography. It aims to be faster, simpler, leaner, and more useful than IPsec, while avoiding the massive headache. It intends to be considerably more performant than OpenVPN. WireGuard is designed as a general purpose VPN for running on embedded interfaces and super computers alike, fit for many different circumstances. Initially released for the Linux kernel, it is now cross-platform (Windows, macOS, BSD, iOS, Android) and widely deployable. It is currently under heavy development, but already it might be regarded as the most secure, easiest to use, and simplest VPN solution in the industry.
WireGuard 是用 C 语言编写的内核级(Linux 内核 >= 5.6)隧道程序,加密技术先进、配置简单,被视为下一代 VPN 协议,旨在解决许多困扰 IPSec/IKEv2、OpenVPN 或 L2TP 等其他 VPN 协议的问题。甚至 Linus Torvalds 都称赞其为艺术品(邮件原文):
Can I just once again state my love for it and hope it gets merged
soon? Maybe the code isn't perfect, but I've skimmed it, and compared
to the horrors that are OpenVPN and IPSec, it's a work of art.
官网地址:https://www.wireguard.com
WireGuard 部署
安装应用
在 Debian 11 的安装命令:
sudo apt install wireguard生成密钥
wg genkey | tee server_privatekey | wg pubkey > server_publickey
wg genkey | tee client_privatekey | wg pubkey > client_publickey
部署应用
创建配置文件 /etc/wireguard/server.conf:
[Interface]
Address = 192.168.56.10
ListenPort = 51820
PrivateKey = server_privatekey 文件内容

[Peer]
PublicKey = client_publickey 文件内容
AllowedIPs = 192.168.56.11
启动应用:
wg-quick up server一键脚本
可以参考第三方的脚本,支持一键安装、卸载、更新、自动随机化配置WireGuard,地址是https://github.com/teddysun/across/blob/master/wireguard.sh。
官网教程
WireGuard 的官网有非常详细的使用教程,甚至还有动画演示。详见https://www.wireguard.com/quickstart。
WireGuard 实例
https://tunnel.pyjam.as是基于 WireGuard 实现的 HTTP 隧道,与 ngrok.com 的免费功能类似。以映射本地 8080 端口为例:
curl https://tunnel.pyjam.as/8080 > tunnel.conf && wg-quick up ./tunnel.conf如图所示,即可用随机域名访问本地 web 项目。
后记
标签: 开源实例


